How to Create a Taxable ERC20 Token on Ethereum for Passive Income

Published: July 22, 2025, Author: MakeYourCoin
Phantom Wallet is a popular non-custodial crypto wallet that supports multiple blockchains, including Solana, Ethereum, Base, Polygon, Sui, Bitcoin, and others. Changing the network on Phantom allows you to interact with different blockchains or test environments like Devnet or Testnet for development purposes.
This step-by-step guide will walk you through the process of changing the network on Phantom Wallet when you’re using the mobile app.
You might need to switch networks to:
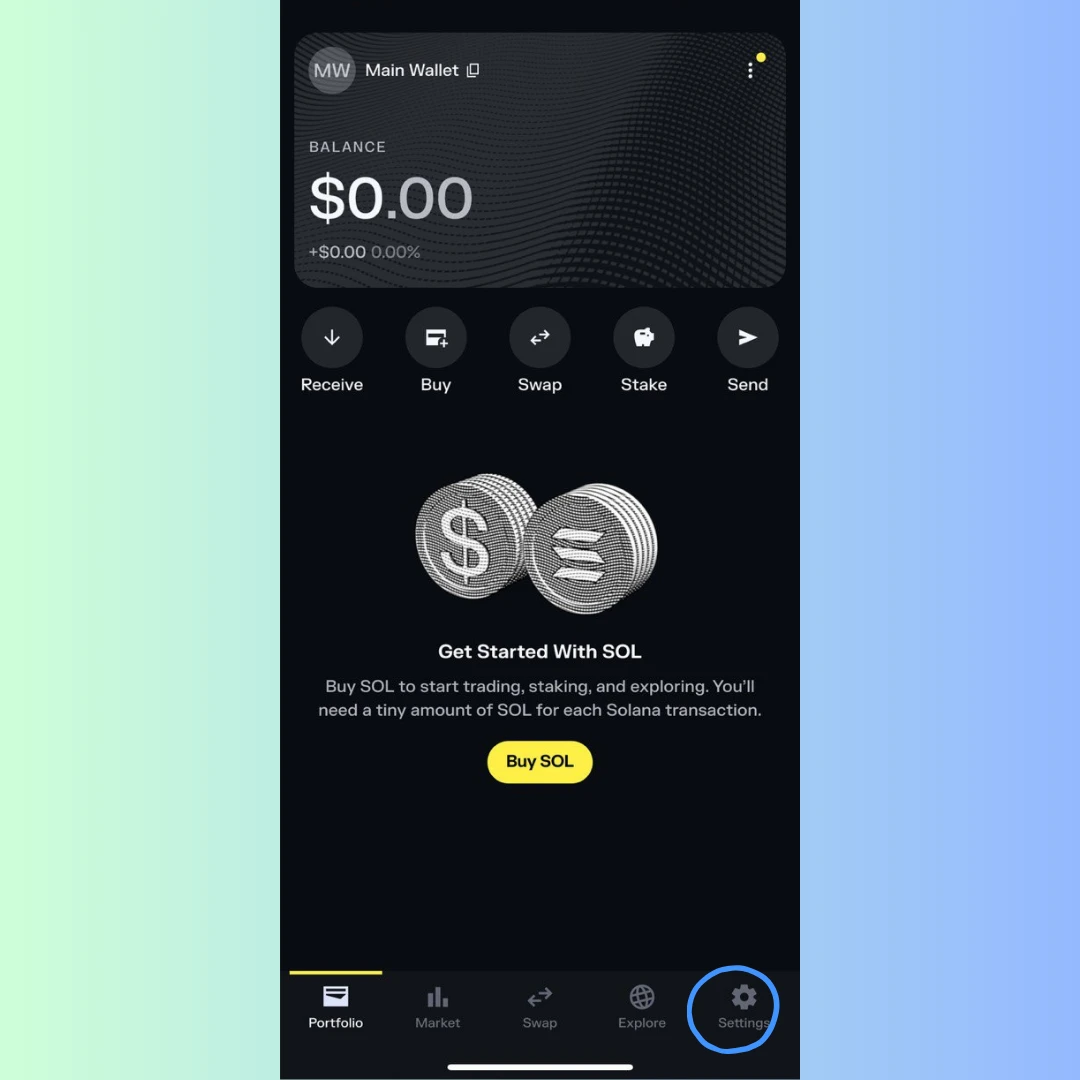
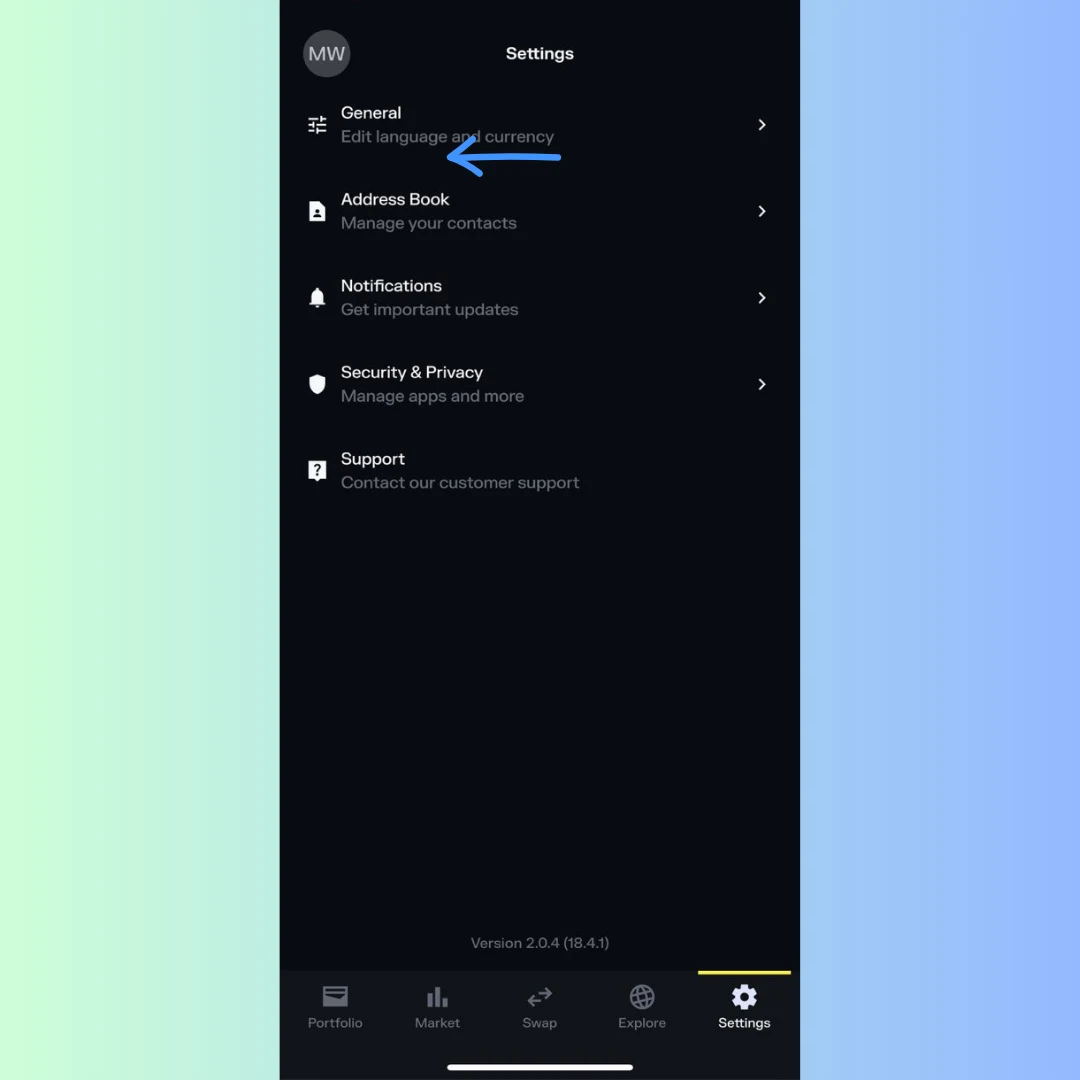
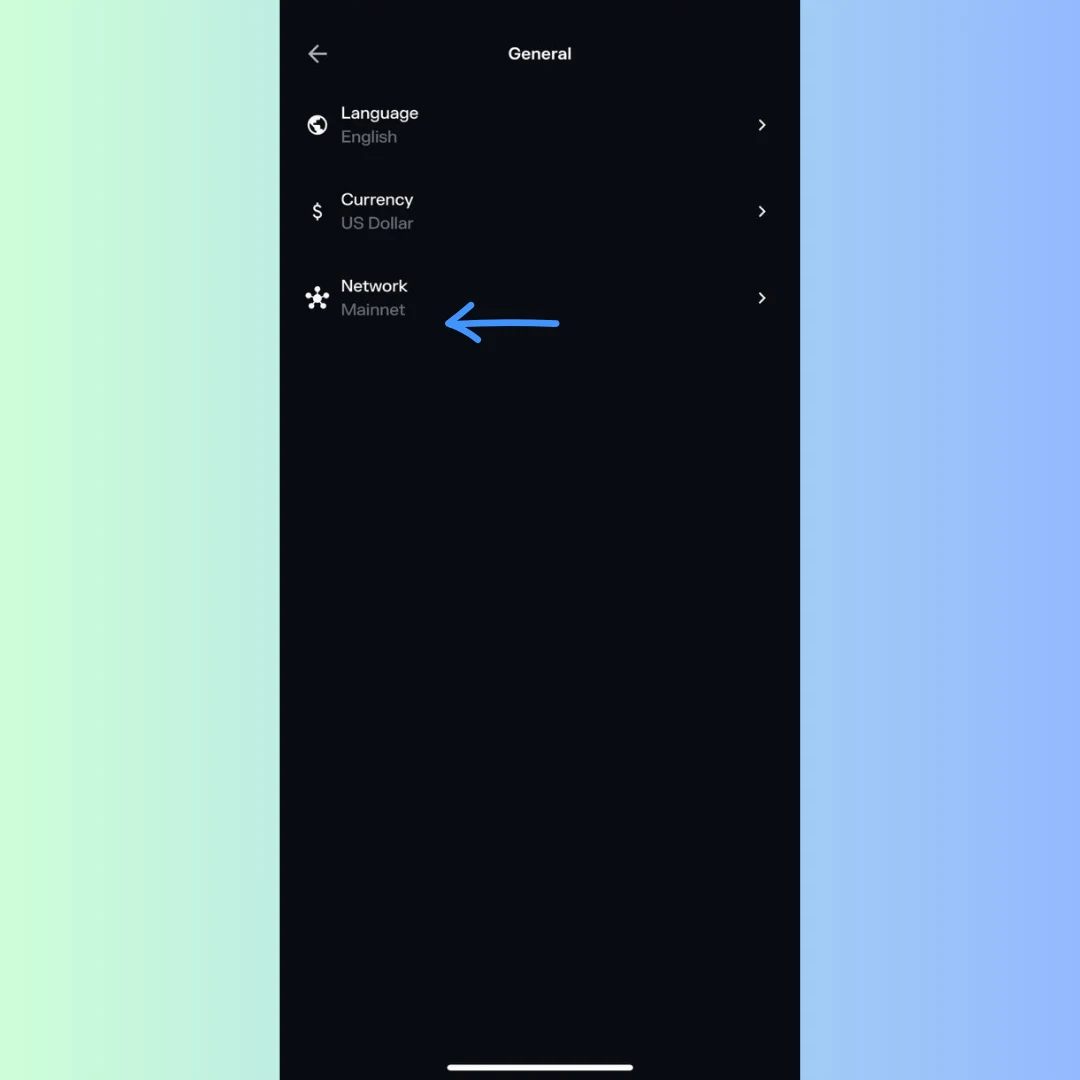
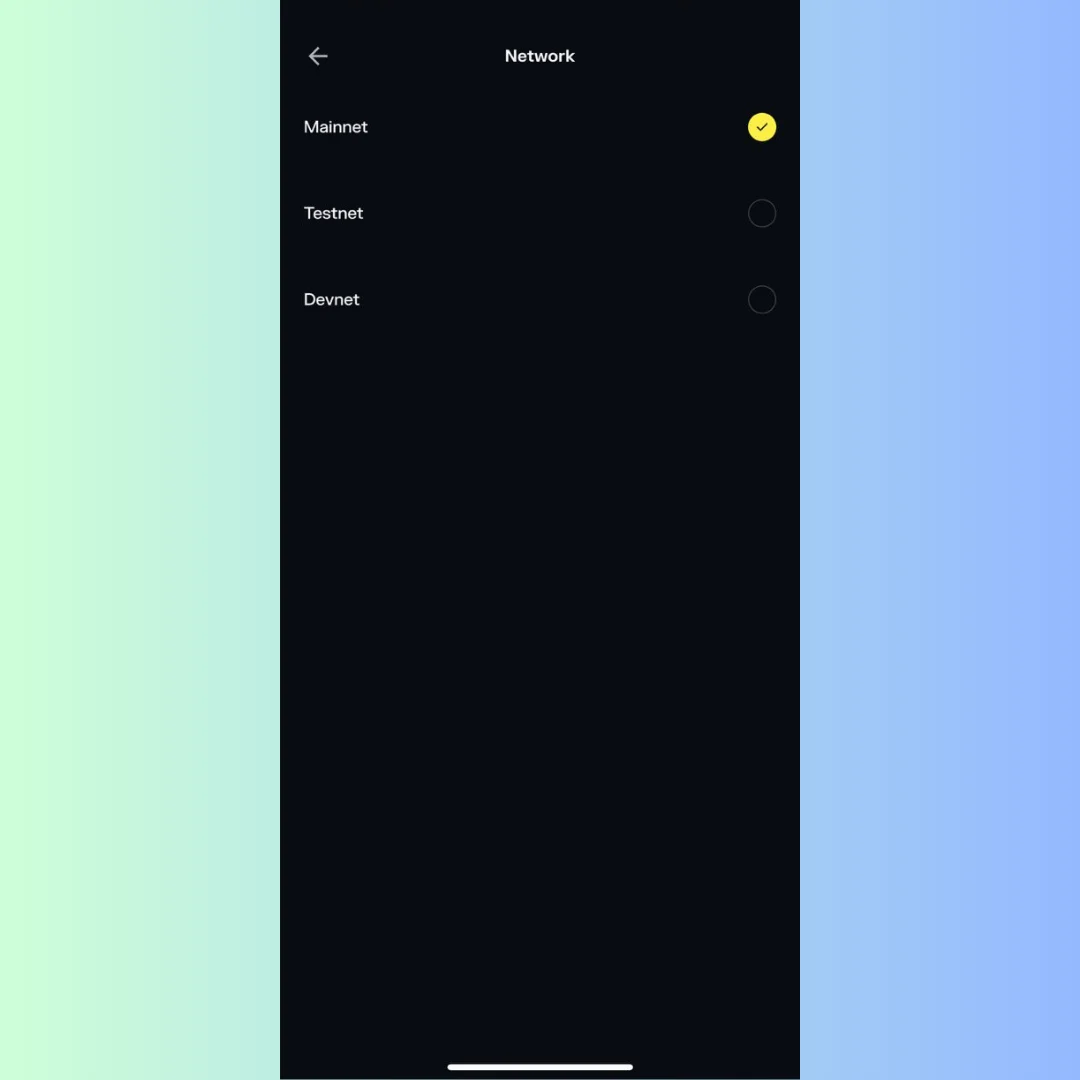
Double-Check Network Compatibility: Ensure the dApp or transaction you’re performing is compatible with the selected network. For example, use Solana Mainnet for real transactions and Devnet for testing.
Keep Native Tokens: Each network requires its native token for transaction fees (e.g., SOL for Solana, ETH for Ethereum or Base, POL for Polygon). Ensure you have enough to cover fees.
Stay Secure: Never share your Secret Recovery Phrase or private keys. Phantom will never ask for them. Store your recovery phrase offline in a secure location.
Update Phantom: Ensure your Phantom Wallet is up to date to access the latest network support and features. Check for updates in your browser’s extension store or mobile app store.
Separate Profiles for Testing: If using Devnet or Testnet frequently, consider installing Phantom in a separate browser profile to avoid confusion with Mainnet transactions.
Changing the network on the Phantom wallet is a straightforward process that takes just a few clicks or taps. Whether you’re enabling a new blockchain like Base or switching to Solana’s Devnet for testing, following these steps ensures you can manage your assets across multiple networks seamlessly. Always verify the network before transacting, and keep your wallet secure by safeguarding your recovery phrase.
For more information or advanced features, check out Phantom’s official resources at phantom.com or their help center at https://help.phantom.com/hc/en-us.